
The Secret to Fatter Drums and Bass Using Multiband Saturation in Cubase
Let’s face it—drums and bass can sound a little...thin. Even when they’re well-recorded and properly mixed, there’s sometimes something missing: that low-end fullness that just glues everything together. But here’s the good news: you don’t need another plugin to fix it. There’s a powerful technique using multiband saturation that can instantly add weight, warmth, and punch to your mix.
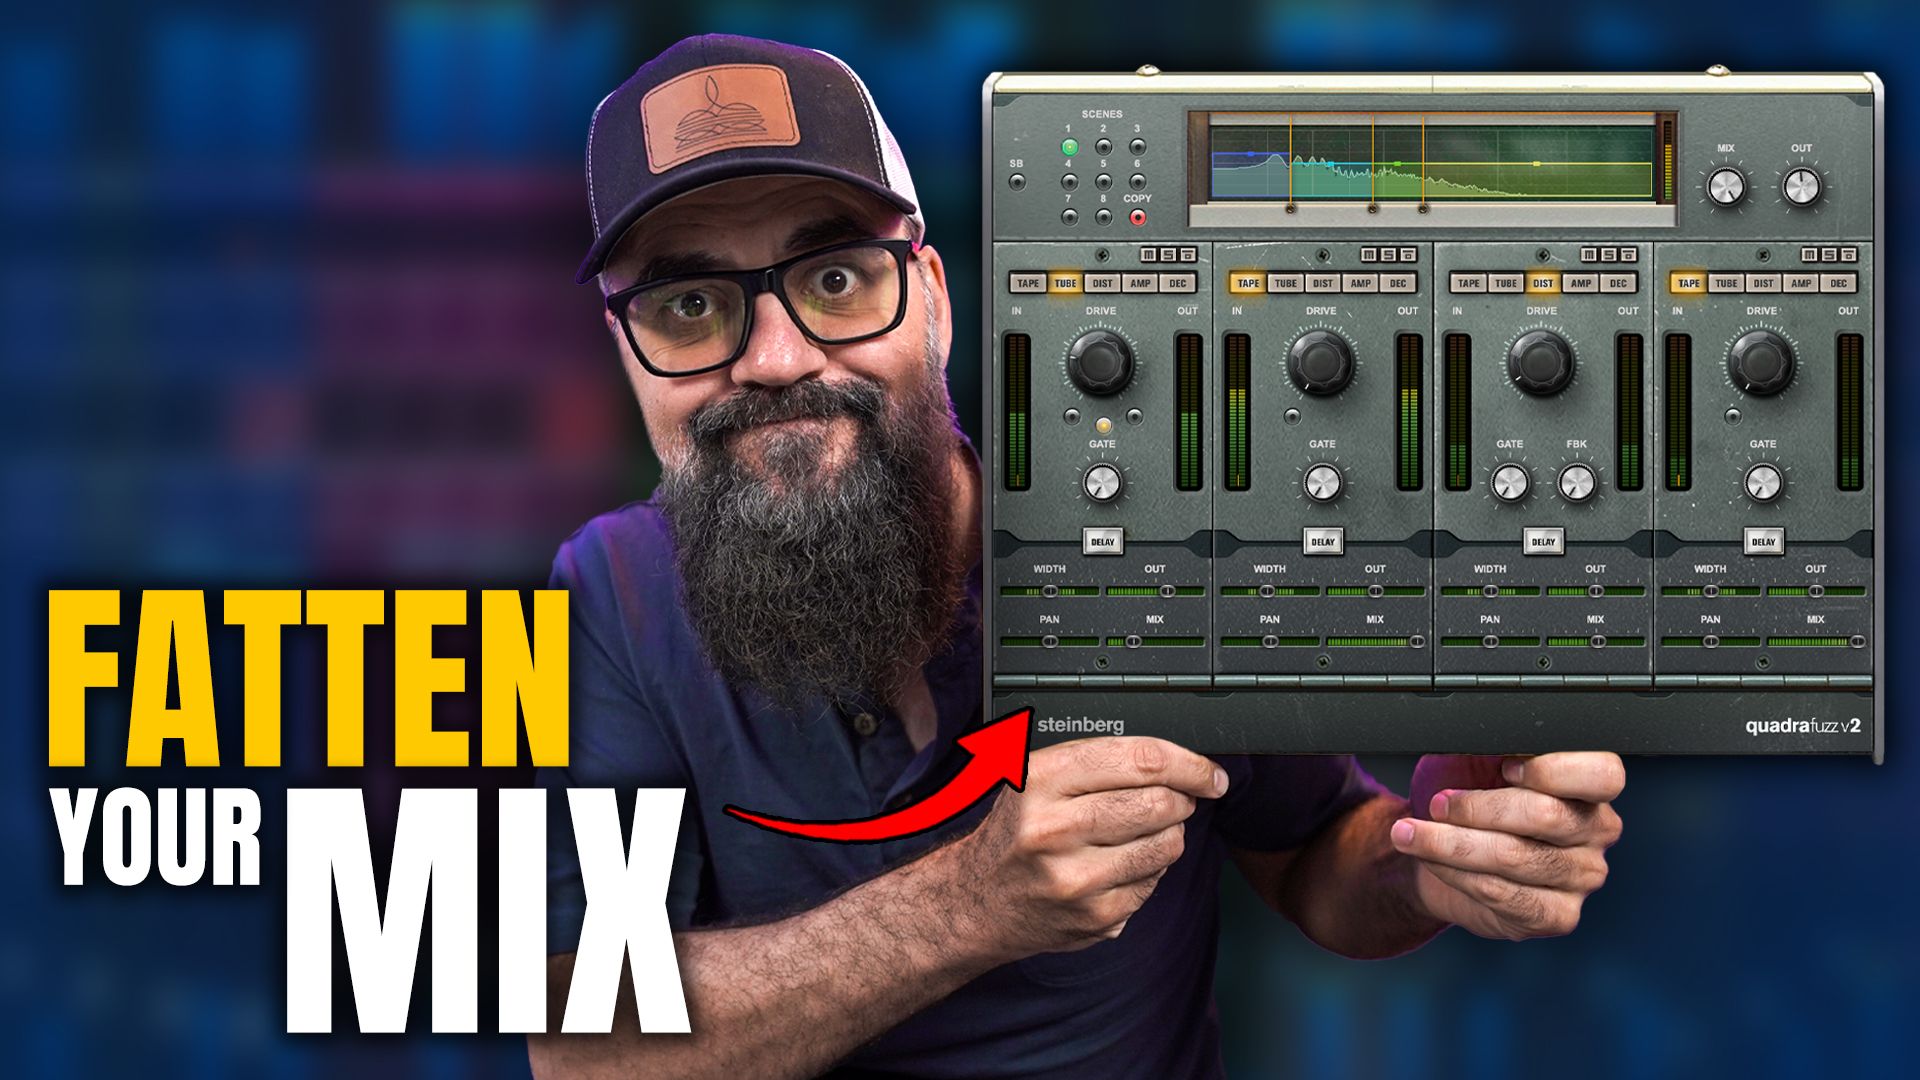
And if you're using Cubase, there's a stock plugin that does the trick beautifully.
Why Multiband Saturation Works
Saturation adds harmonic content, which fills out the sound in a natural way—especially when applied selectively to certain frequency bands. This is where multiband saturation becomes incredibly useful. Instead of saturating the entire signal, you can focus the effect on specific parts of the frequency range, like the low end for thickness or the high end for clarity.
Compression and saturation often go hand in hand. If you're still wrapping your head around compression, I made a free guide called The Fundamentals of Compression—it's a simple breakdown that helps make compression easier to actually use in a mix.
Fattening Up the Low End
Let’s say you’ve got your drum bus ready to go. Load up a multiband saturation plugin and solo the lowest frequency band—anything below around 110Hz is a great place to start, but adjust based on your mix.
Now, here’s the secret sauce: choose tube saturation and set it to dual or triple tube mode. This adds rich, harmonic saturation to the low band, giving the kick and low end of the snare a warmer, rounder sound. You’ll not only hear more weight but also a slight increase in perceived volume—without even touching a fader.
The harmonics generated will extend beyond the selected band, which means your kick might get a bit of extra help in the upper mids too—and that’s a good thing. That subtle crossover brings depth and character, making the drums feel more alive.
Keep It Under Control
Of course, it’s easy to overdo it. That’s why the mix or blend knob is your best friend. Set the saturation to 100% first, so you can clearly hear the effect, then dial it back to taste. Often, 20–30% mix is enough to add body without overwhelming your original tone.
Want to dive deeper into mixing techniques like this? Check out the Ultimate Cubase Mixing Masterclass, where I break down my full mix process—step by step—using only the tools inside Cubase.
Don’t Forget the Bass
The same approach works wonders on bass guitar. Use tube saturation on the low band to enhance the sub frequencies. Then, for clarity, activate another band focusing on the midrange—say, between 800Hz and 2kHz. Add a touch of distortion or saturation there, and suddenly your bass will stand out on smaller speakers without losing its foundational power.
Bonus: High-End Clarity on Drums
If your snare or cymbals feel a bit dull, try using multiband saturation in the high-frequency range (around 6kHz to 10kHz). Be gentle here—just a pinch of drive and a low mix value. The result? A touch more crispness and presence, without the harshness that EQ boosts can sometimes introduce.
Wrap-Up
Multiband saturation is a versatile and powerful mixing tool. Whether you're fattening up a kick, adding midrange clarity to a bassline, or brightening a snare, the key is knowing which band to target—and using subtlety to your advantage. Once you get used to it, you’ll wonder how you mixed without it.
➜ Want to hear what this sounds like in action?
I walk through the full process, step by step, in this video—so you can hear exactly how multiband saturation brings your drums and bass to life.
Watch it here